
4 Ways to Re-Tune Music to 432hz and 528hz
The last one being the easiest!

Below, we outline four distinct methods for discovering, commissioning, and retuning music to 432hz and 528hz, as well as other Solfeggio Frequencies. We'll begin with the manual process of retuning music using digital audio workstations before exploring alternative methods for accessing retuned music.
Table of Contents
Using Digital Audio Workstations to Re-Tune Music to 432hz
Re-Tuning to other Frequencies
Pros and Cons of Using DAWs
Commissioning Artists
Finding 432hz and 528hz Tuned Music
Using Websites to Re-Tune to 432hz
Using HZP to Re-Tune to any Frequency.
Option #1: Using Digital Audio Workstations.
Let’s get started with the first option: Using Digital Audio Workstations.
For those of you that have your tracks downloaded on your computer as an audio file, we can drag them into a digital audio workstation. Let’s start with Ableton, one of the most popular DAWs out there. First, we are going to drag our track into the timeline, then we can search for a plugin called “Shifter”. Shifter allows us to shift our audio up or down by note, or frequency!
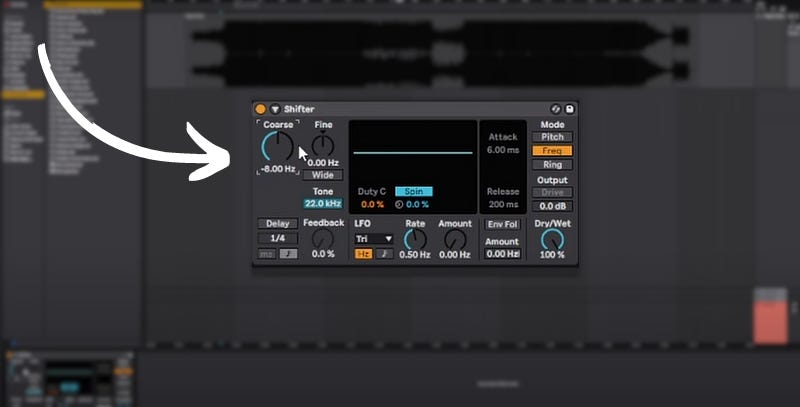
In most cases, the song you'll be retuning is tuned to 440hz, meaning the A4 note resonates at a frequency of 440hz. Our objective here is to lower every frequency in the track by 8hz to include 432hz.
By utilizing our shifter plugin to reduce every frequency by 8hz, we effectively incorporate 432hz into the track.
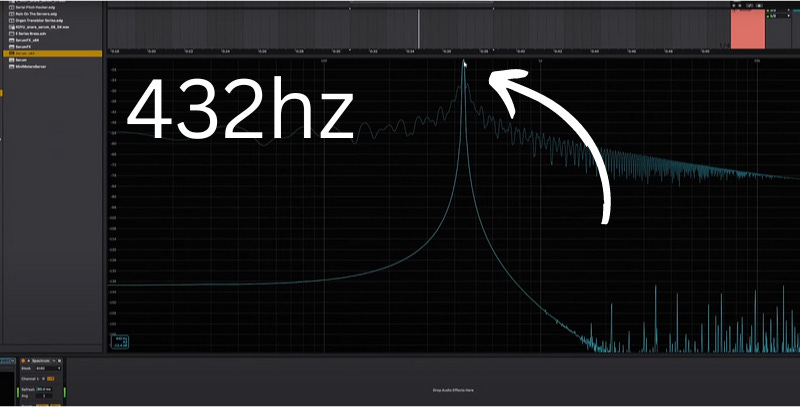
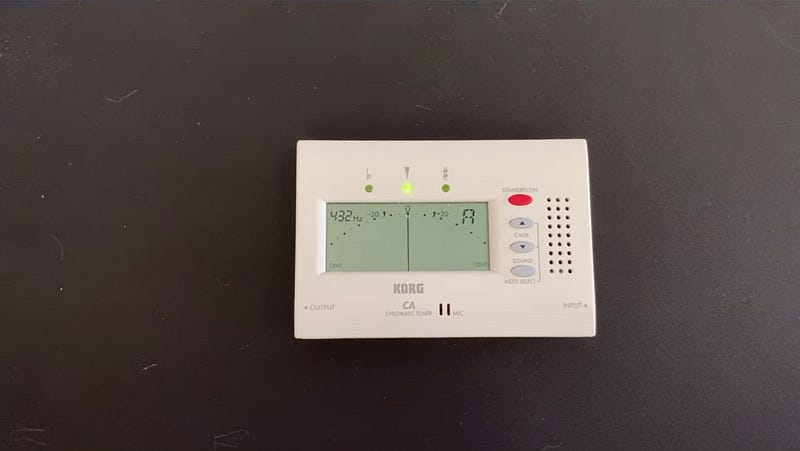
A practical method to verify our results is by generating a pure 440hz tone. We can achieve this by creating one using a synthesizer, playing A4 at standard tuning. Subsequently, we'll apply a shifter plugin to this track and retune it to 432hz. Now, let's delve into how to retune songs to other popular frequencies like 528hz.
When attempting to use a shifter plugin to retune songs to other frequencies like 528hz, we encounter some challenges. Shifting songs up or down in frequency by significant amounts often results in unwanted alterations to our audio. This discrepancy arises because the frequency spectrum, as perceived by our ears, is exponential rather than logarithmic. For instance, the difference between 3330hz and 3339hz may not be perceptible, whereas a bass note playing at 120hz versus 129hz is readily noticeable.
To address this issue, we must shift the A4 frequency of 440hz to a different frequency that encompasses the desired frequency. This approach allows us to avoid making large shifts in frequency. Refer to the timetable provided to identify which frequencies we need to shift 440 to in order to include your desired frequency.
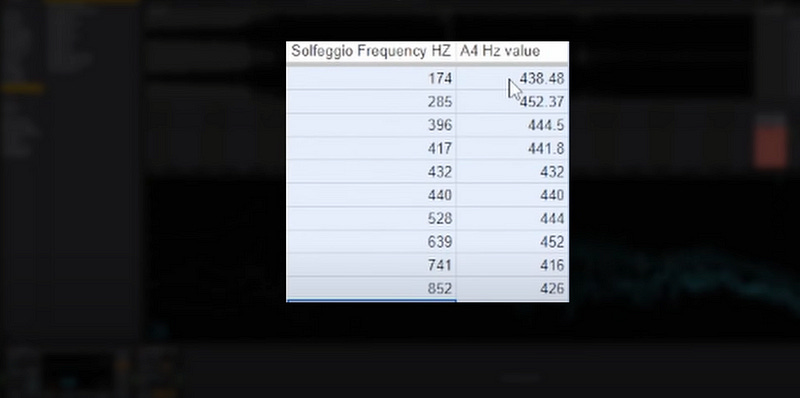
So, simply set your shifter plugin to the desired A4hz value, and you will include the Solfeggio Frequency it corresponds to! We can check out work with that pure tone using an instrument tuner.
Ableton however is an expensive and complex digital audio workstation, let’s try using something more accessible, like Audacity! Simply drag your music into Audacity, then highlight the entire track. Then we need to go to the top left and select change pitch.
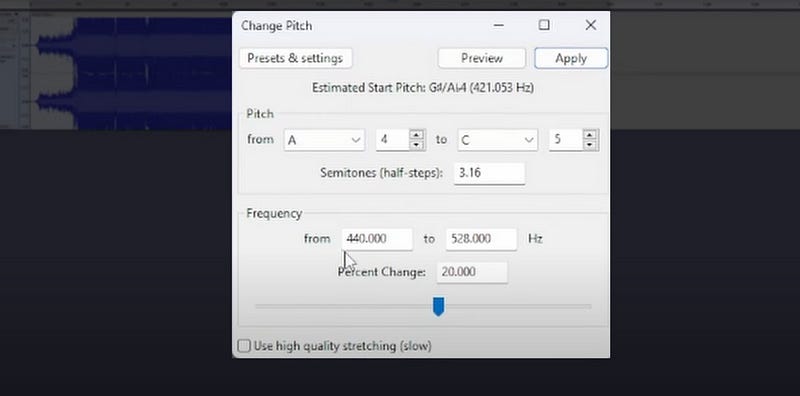
We can select the exact note that we want to change, again in most cases this will be the A4 at 440hz. Then we need to insert the frequency we want to change to 432hz. Again, if we want to change the frequency in large amounts, take a look at that excel table in the previous step to see where you should shift the A4!
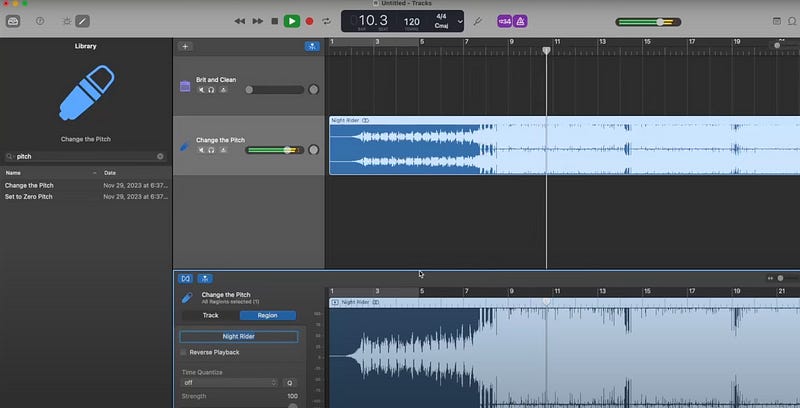
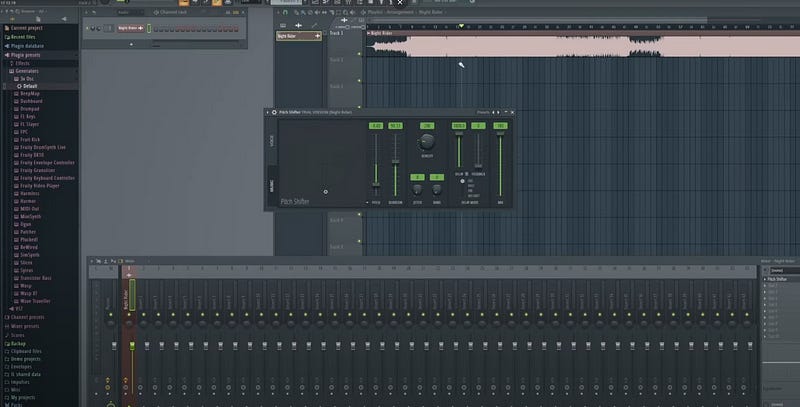
Some other popular DAWs include Garage Band and FL Studio, which you may have heard of. These two programs do include a pitch changing or shifting option, however there does not seem to be an easy way of specifically changing the frequency. They are accessible and have great trial versions however.
This leads to one of the main cons of using Digital Audio workstations to change frequencies. Not every single DAW is going to have an easy way to achieve this like Ableton with it’s shifter plugin.
That along with the price of some of these digital audio workstations make this option a bit of a pain. Not to mention having to manually change the frequency information of each track, one by one.
Let’s quickly break down the pros and cons of manually re-tuning your music using digital audio workstations.
Pros: You can re-tune to any frequency you would like, you have full control!
Cons: The software can be expensive, up to hundreds of dollars for non-trial versions. Re-tuning each song one by one can be time consuming as well. You also have to have the music you want to re-tune downloaded onto your computer.
Option 2: hiring someone to create 432hz or 528hz music.
Let’s move on to the next option, hiring someone to create 432hz or 528hz music.
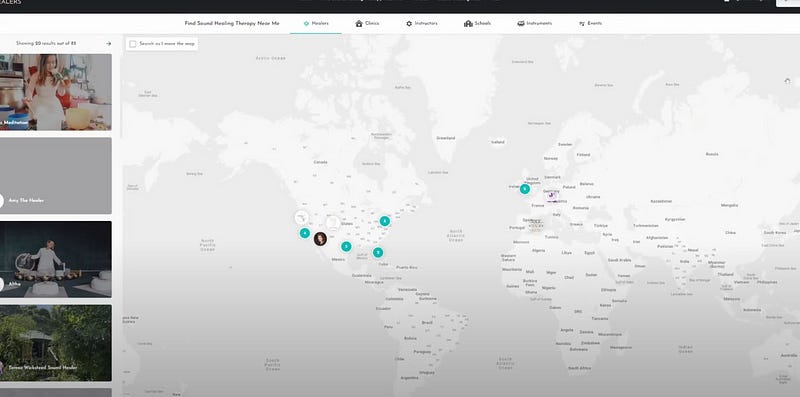
Sites like Soundhealers.net will allow you to reach out to sound healing practitioners. You can always commission others to create sound healing music like music tuned to 432hz and 528hz. However this can be expensive!
It also may be difficult to find some one who will create the exact music you want to listen to. This is not a way to re-tune music but rather create music.
Let’s go over the pros and cons of hiring someone to create 432hz or 528hz tuned music!
Pros: You can commission exactly the kind of music you want!
Cons: This can be expensive, depending on who you find to commission music from. Finding those who create tuned music can be time consuming and difficult.
Let’s move on then to our 3rd option: Finding Music.
Option 3: Finding music already retuned.
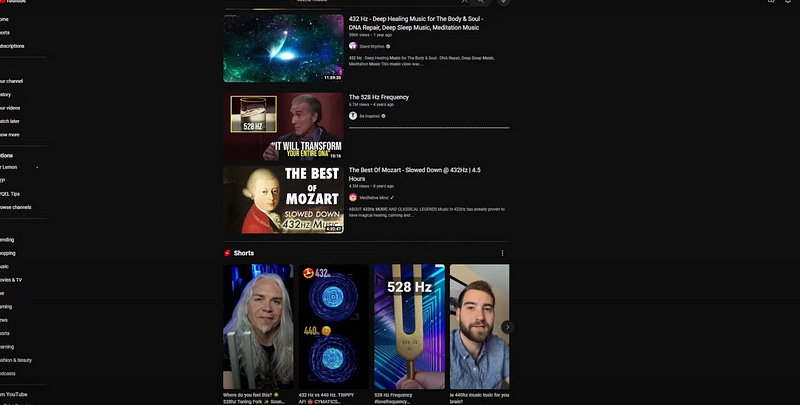
Youtube, Soundcloud, Spotify, and beyond all feature large libraries of music that I am sure you are already listening to. These services have large libraries of music that has already been re-tuned to 432hz and 528hz!
The main problem you may run into is finding music that you actually want to listen to, as a lot of the content on these platforms that is already posted is meditation music, or rather music using singing bowls, tuning forks, gongs, etc.
Let’s keep things moving.
With a simple google search, you will be able to find websites that claim they can take your MP3 and WAV files and re-tune them for you to 432hz. All you need here is an internet connection and your downloaded music files.
The problem with this is that we have no way of validating these websites’ claims of correctly tuning these files to 432hz. As well as having to upload your files one by one.
A way we can validate methods like this is uploading a pure 440hz tone, then using an instruments tuner like before to validate it’s output is 432hz.
Let’s now go over the pros and cons of using finding tuned music online or using free websites to re-tune music:
Pros: There is a large library of tuned music for you to find! Using the free websites to tune music for you is also easy and very accessible.
Cons: Depending on the streaming service, you may not find the music you are looking for or want to listen to. We also have no way of validating the free websites way of re-tuning music.
Option 4: HZP (by far the easiest and fastest!)
Now let’s move on to the possible the easiest solution: HZP.
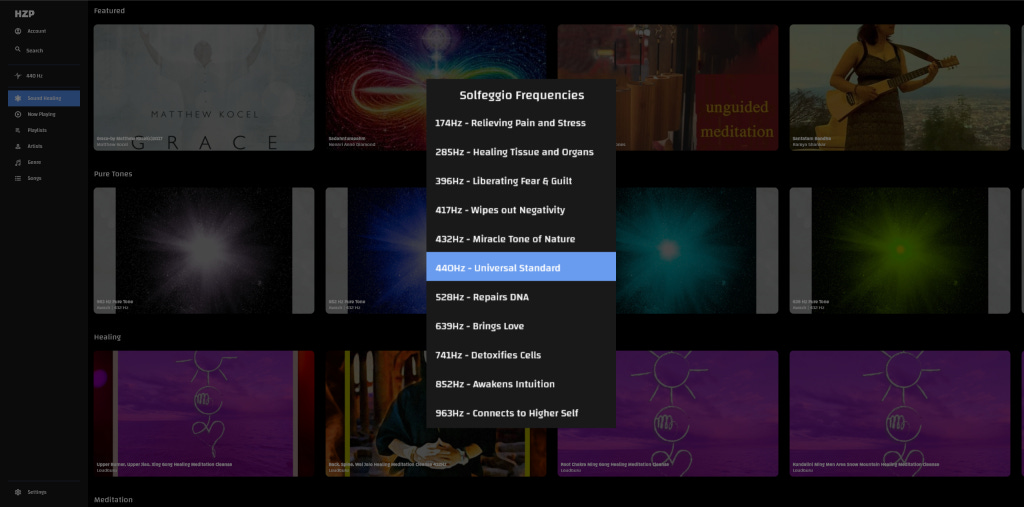
HZP and Solfeggio Frequencies Player are music apps that enable you to retune your music to all of the Solfeggio Frequencies and 432 Hz tuning in real time.
SFP is purely a music player and is available on iOS, Mac, Android, Amazon Fire & Windows
HZP is a music streaming app and music player that is available on the web, mobile, desktop, cars and even TV’s! HZP includes the entirety of Audius music catalog and the SYQEL music visualizer. Both apps are by far the easiest way to re-tune the music you want to the frequency you want saving you precious time and storage!
You can re-tune any song on the fly. You are also able to upload your own files to re-tune as you’d like. This is a great way to passively introduce sound healing throughout your day.
Discover our different music re-tuning software here: https://solfeggiofrequencies.org/apps
My favorite song 528Hz by Rampa.